| .. | ||
| add_ons | ||
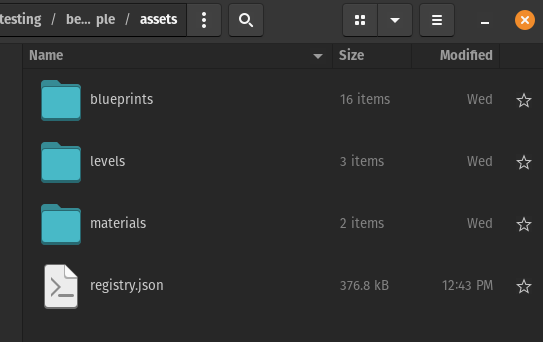
| assets | ||
| blueprints | ||
| core | ||
| docs | ||
| levels | ||
| materials | ||
| tests | ||
| __init__.py | ||
| blender_manifest.toml | ||
| old.md | ||
| pytest.ini | ||
| README-blueprints.md | ||
| README-components.md | ||
| README-export.md | ||
| README-levels.md | ||
| README-tech.md | ||
| README.md | ||
| settings.py | ||
Blenvy: Blender add-on
This Blender addon gives you:
- an easy to use UI to add and configure your Bevy components inside Blender
- the UI is automatically generated based on a registry schema file, an export of all your registered Bevy components's information, generated by the registry export part of the Blenvy crate
- the ability to toggle components on/off without having to remove the component from the object
- an easy way to create blueprints/prefabs (just collections !) & levels
- a way to setup you assets for your levels & blueprints
- an automatic export of your level/world from Blender to gltf whenever you save your Blend file.
- export of used /marked collections as Gltf blueprints
- change detection, so that only the levels & blueprints you have changed get exported when you save your blend file
- export of material librairies
IMPORTANT !! if you have previously used the "old" add-ons (gltf_auto_export & bevy_components), please see the migration guide If you can I would generally recommend starting fresh, but a lot of effort has been put to make transitioning easier
Installation:
- grab the latest release zip file

-
up to Blender 4.1 go to edit => preferences => add-ons, click on install and choose the path where
blenvy.zipis stored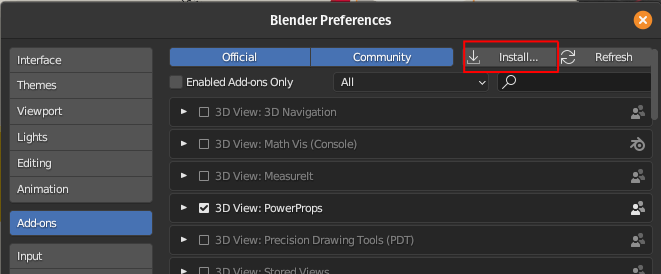
-
for Blender 4.2 , just drag & drop the zip file onto Blender to start the installation process
Quickstart
- create your Bevy project
- setup the Blenvy crate
- create a Blender project
- set your level & library scenes (the only things that are not pre-configured)
- create your blueprints & levels
- add components (remember to configure the Bevy side first )
- save your blend file at any point , the rest is done automatically (export of levels & blueprints, etc)
Configuration:
Bevy side
- setup the Blenvy crate for your project (see the crate's documentation for that), and compile/run it to get the
registry.jsonfile to enable adding/editing your components in Blender
Blender side
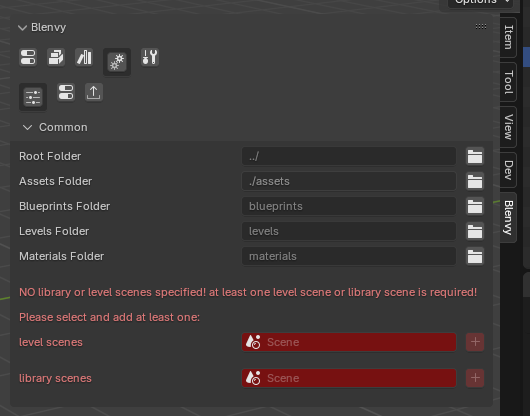
The add-on comes almost completely pre-configured with sensible defaults, but you can set the following settings to your liking
Common
The first tab (and the one that is open by default in a new project) contains the common settings:
you need to tell Blenvy
- what your level scenes are (what Blender scenes should become levels in Bevy)
- what your library scenes are (what Blender scenes will store your library of re-useable blueprints)
Blenvy is opinionated !
- keep you art/sources (usually not delivered with your game) seperate from your game assets
- keep your blueprints/levels/materials gltf files seperate
Root Folder (default: ../)
- this is the same folder as your Bevy projects main folder: the path here is relative to the current .blend file
Assets Folder (default: ./assets)
- a path, relative to the root folder above, where you want to store your assets (delivered with your game)
Blueprints Folder (default: blueprints)
- a path, relative to the assets folder above, where you want to store your blueprints
Levels Folder (default: levels)
- a path, relative to the assets folder above, where you want to store your levels
Materials Folder (default: materials)
- a path, relative to the assets folder above, where you want to store your materials
Level scenes
- what are the scenes in your .blend file that are levels/worlds
library scenes
- library scenes: what are the scenes in your .blend file that contain your libraries of blueprints (that you then use in your levels)
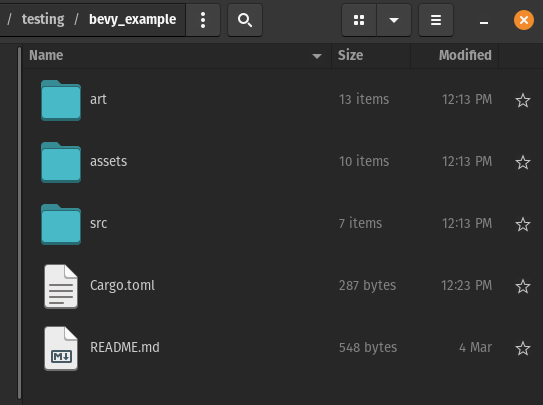
Recomended folder structure
Components & export settings:
Multiple blend file workflow
If you want to use multiple blend files (recomended if your project starts to grow even a bit), use Blender's asset library etc, we got you coverred too ! There are only a few things to keep in mind
Assets/library/blueprints files
- mark your library scenes as specified above, but do NOT specify a level scene
- mark any collection in your scenes as "assets"
- choose "split" for the combine mode (as you want your gltf blueprints to be saved for external use)
- do your Blender things as normal
- anytime you save your file, it will automatically export any relevant collections/blueprints
- (optional) activate the material library option, so you only have one set of material per asset library (recomended)
Level/world files
- mark your level scenes as specified above ( personally I recommended NOT specifying a library scene in this case to keep things tidy, but that is up to you)
- configure your asset libraries as you would usually do, I recomend using the "link" mode so that any changes to asset files are reflected correctly
- drag & drop any assets from the blueprints library (as you would normally do in Blender as well)
- choose "split" for the combine mode (as you want your gltf blueprints to be external usually & use the gltf files generated from your assets library)
- do your Blender things as normal
- anytime you save your file, it will automatically export your level(s)
Take a look at the relevant example for more details
Useage
Components
- for a detailed overview on how to add, edit, remove etc components please see here
Export
- for a detailed overview on auto exporting gltf files please see here
Levels
- for a detailed overview of blueprints please see here
Blueprints
- for a detailed overview of blueprints please see here
Tip
you can right click on a Blueprint instance in your level scenes or press SHIFT + F to edit a Blueprint in a seperate temprary scene ! you can right click or press SHIFT + F to create a new empty Blueprint and an instance of it from your main scenes right click again & select the option to stop editing it, or
Development
- I highly recomend (if you are using vscode like me) to use this excellent extension , works easilly and fast , even for the latest versions of Blender (v4.0 as of this writing)
- this article might also help out (easy enough to get it working on linux too)
License
This tool, all its code, contents & assets is Dual-licensed under either of
- Apache License, Version 2.0, (LICENSE-APACHE or https://www.apache.org/licenses/LICENSE-2.0)
- MIT license (LICENSE-MIT or https://opensource.org/licenses/MIT)