| assets | ||
| docs | ||
| src | ||
| tools/blender_auto_export | ||
| .gitignore | ||
| Cargo.lock | ||
| Cargo.toml | ||
| LICENSE_APACHE.md | ||
| LICENSE_MIT.md | ||
| README.md | ||
Blender_gltf_components
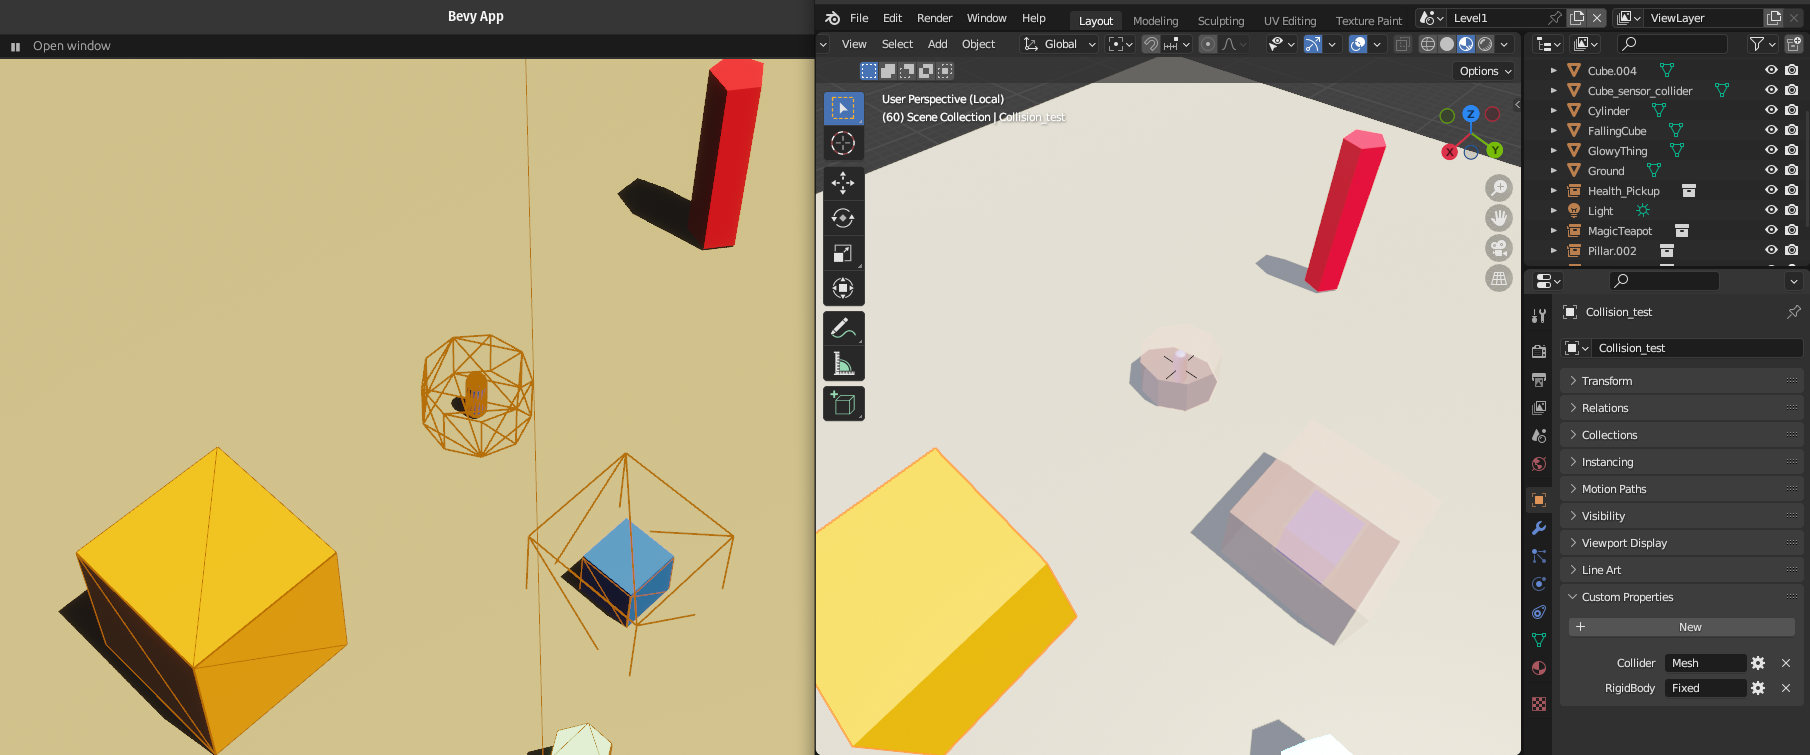
This example, is actually closer to a boilerplate + tooling showcases how to use a minimalistic Blender (gltf) centric workflow for Bevy, ie defining entites & their components inside Blender using Blender's objects custom properties. Aka "Blender as editor for Bevy"
It also allows you to setup 'blueprints' in Blender by using collections (the recomended way to go most of the time), or directly on single use objects .
Features
- Useful if you want to use Blender as your Editor
- define Bevy components as custom properties in Blender (RON, though an older JSON version is also available)
- no plugin or extra tools needed in Blender (but I provide a little Blender plugin to auto-export to gltf on save if you want !)
- define components in Blender Collections & override any of them in your collection instances if you want
- code to auto add additional required components in Bevy (if B is needed with A but B is not present, it adds it: optional & configurable)
- minimal setup & code, you can have something basic running fast
- opensource
There is a video tutorial/explanation if you want, or you can skip to the text version ahead
Workflow
The workflow goes as follows (once you got your Bevy code setup)
All core/helper modules
- add the
coremodule - add the
CorePlugin, to your app.add_plugins(( CorePlugin )) ``` (see [here](./src/main.rs#45))
Or, More modular
- add the
process_gltfmodule code - add the
ProcessGltfPlugin, to your app
(and any other.add_plugins(( ProcessGltfPlugin ))proxyprocessing plugins that you need (or create your own)) see here
Then...
- create & register all your components you want to be able to set from the Blender side (this is basic Bevy, no specific work needed)

-
Create a mesh/ collection (for reuse) in Blender
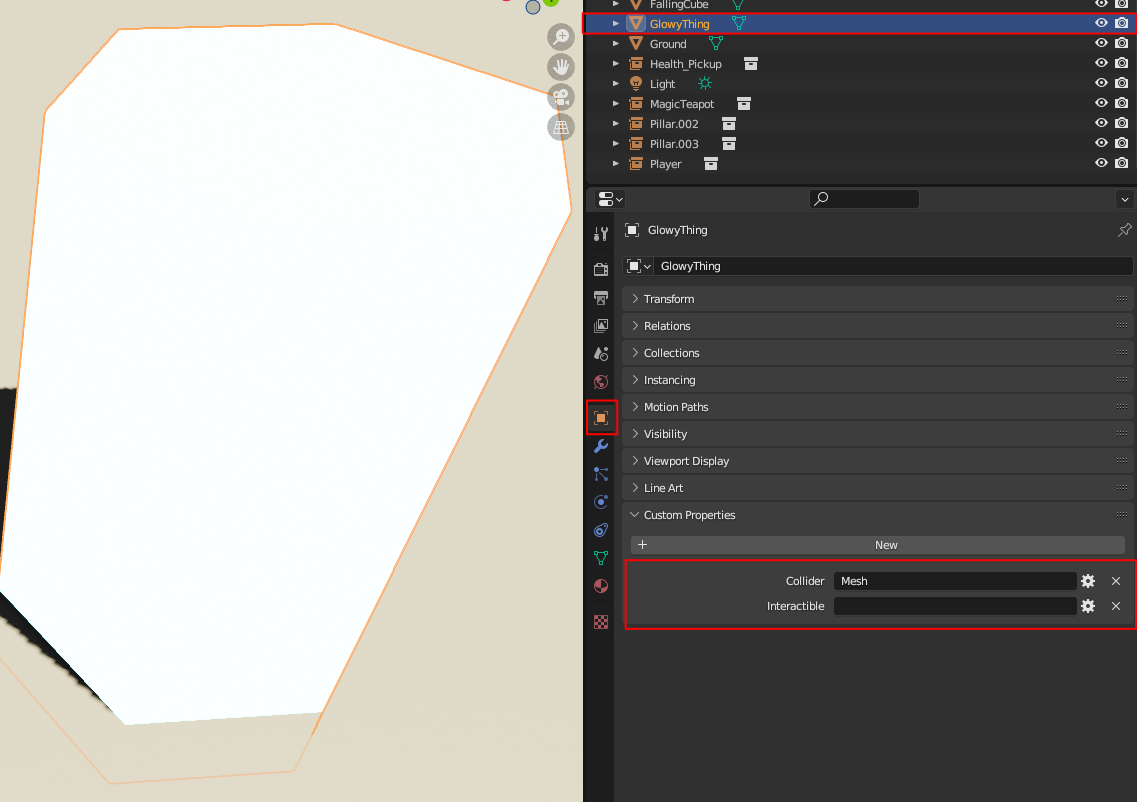
-
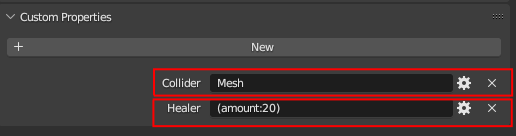
Go to object properties => add a STRING property, and add your component data
-
unit structs, enums, and more complex strucs / components are all supported, if the fields are basic data types
- for structs with no params (unit structs): use an empty value
- for structs with params: use a RON representation of your fields (see below)
In rust:
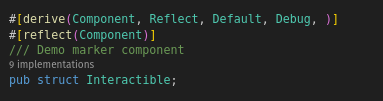
(the Rust struct for these components for reference is here )
In rust:
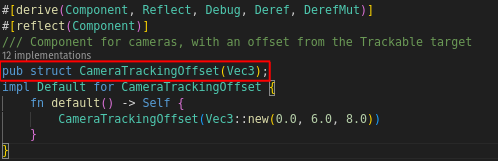
(the Rust struct for this component for reference is here )
Other examples of parameters, Enums (no quotes), strucs with fields etc
-
-
for collections & their instances:
-
I usually create a library scene with nested collections
- the leaf collections are the assets you use in your level
- add an empty called xxxx_components
- add the components as explained in the previous part
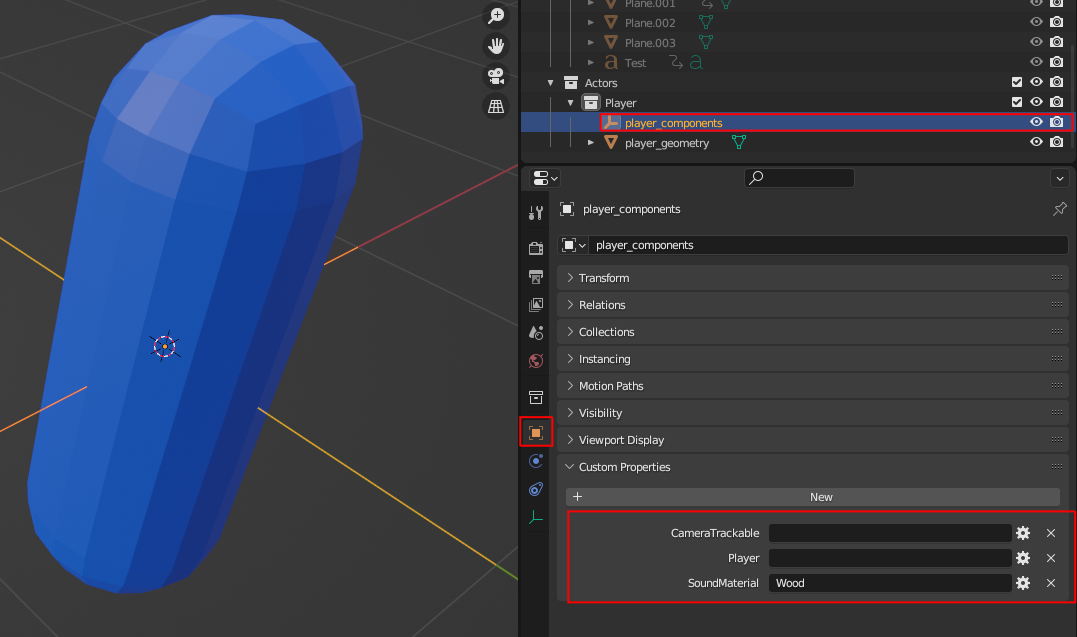
-
In the Level/world itself, just create an instance of the collection (standard Blender, ie Shift+A -> collection instance -> pick the collection)
-
-
export your level as a glb/gltf file : !!IMPORTANT you need to check the following:
- custom properties
- cameras & lights if you want a complete level (as in this example)
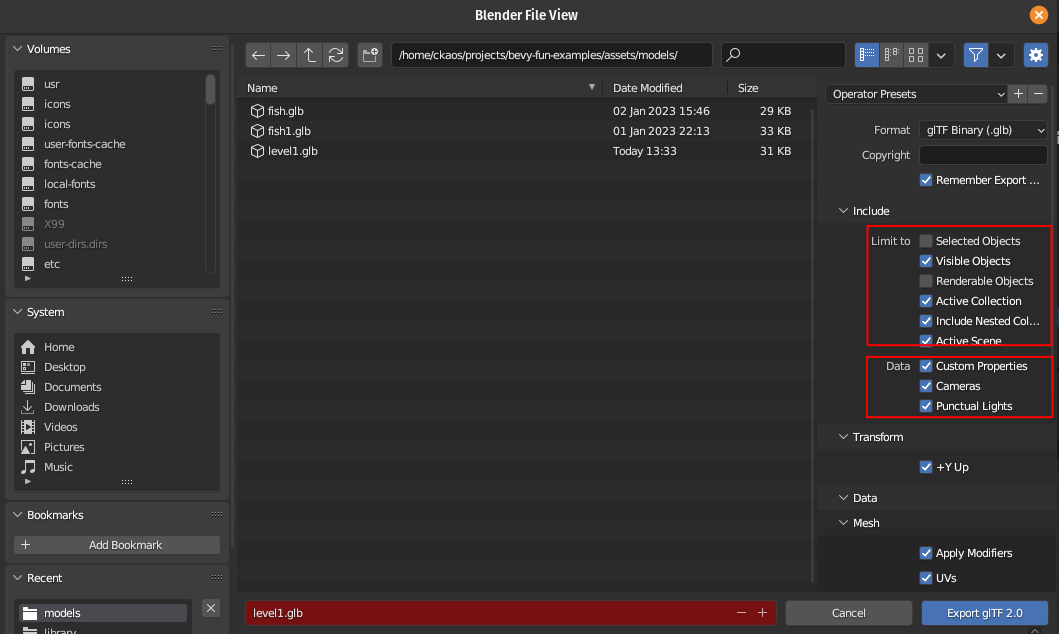
-
load it in Bevy (see the demo main file for this)
-
you should see the components attached to your entities in Bevy
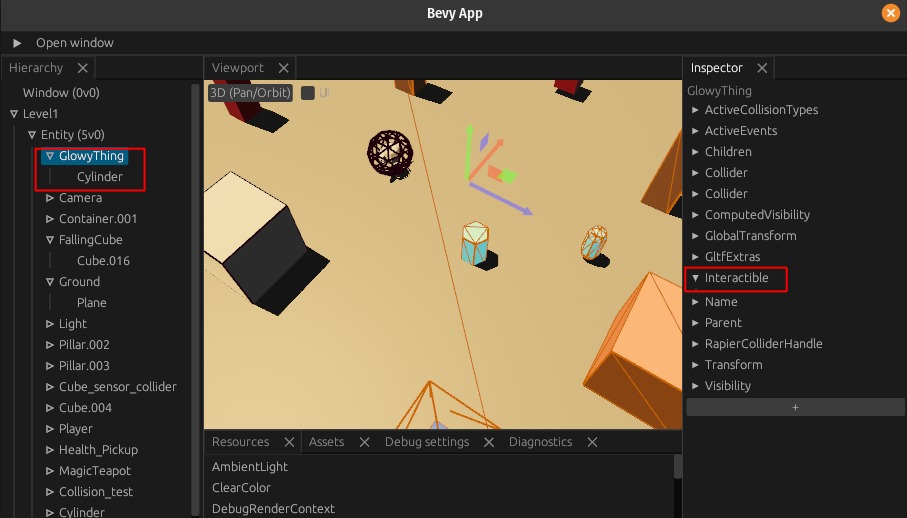
note: you get a warning if there are any unregistered components in your gltf file (they get ignored) you will get a warning per entity

Additional notes
- You usually define either the Components directly or use
Proxy componentsthat get replaced in Bevy systems with the actual Components that you want (usually when for some reason, ie external crates with unregistered components etc) you cannot use the components directly.
Included are the following modules / tools
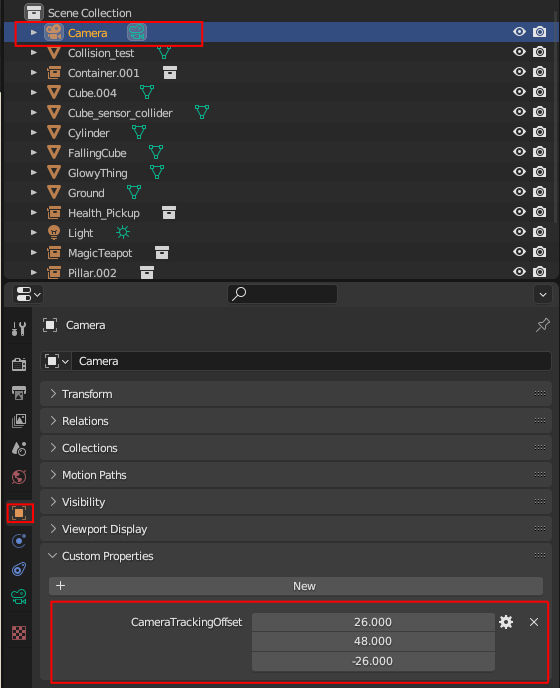
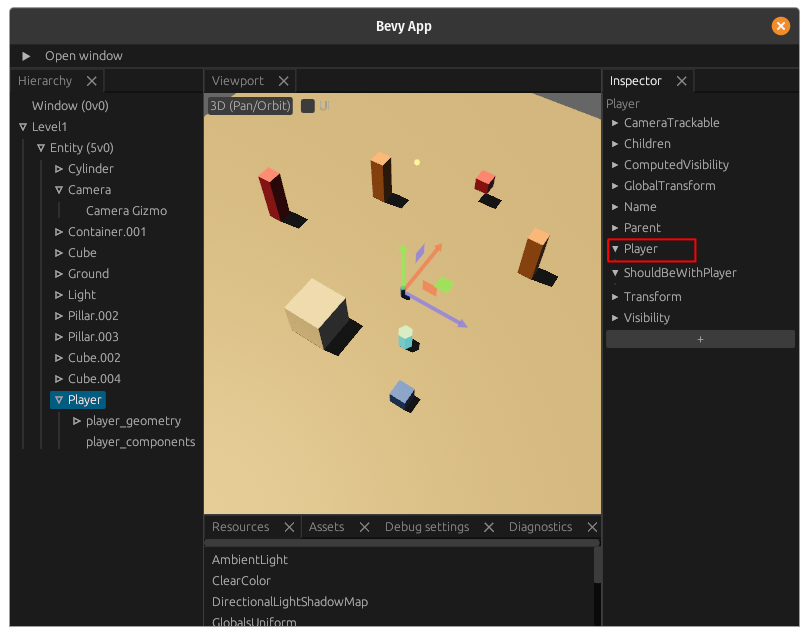
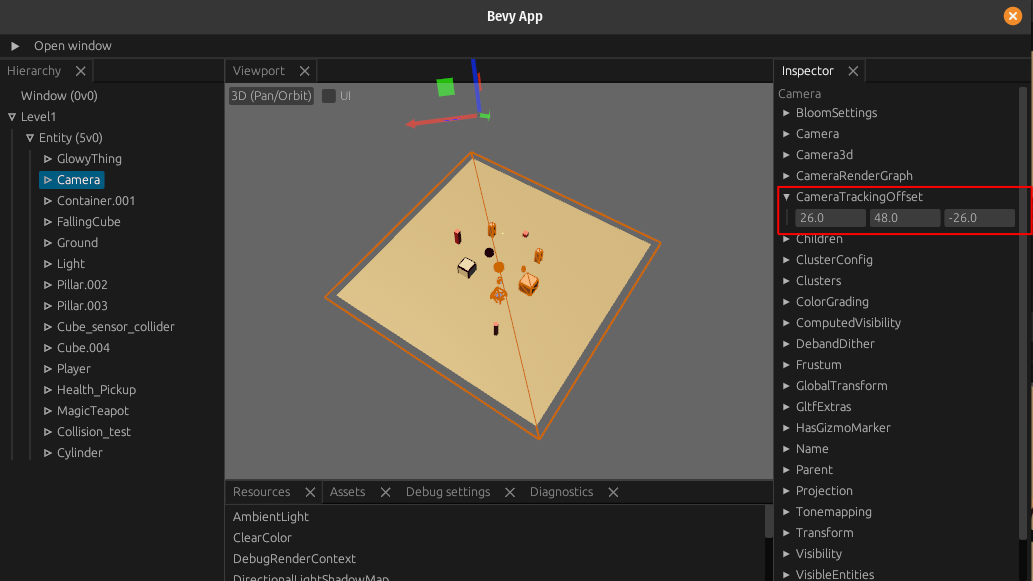
process_gltfthe most important module: this is the one extractingcomponentinformation from the gltf filesinsert_dependant_componenta small utility to automatically inject components that are dependant on an other component for example an Entity with a Player component should also always have a ShouldBeWithPlayer component you get a warning if you use this though, as I consider this to be stop-gap solution (usually you should have either a bundle, or directly define all needed components)cameraan example post process/replace proxies plugin, for Camera that also adds CameraTracking functions (to enable a camera to follow an object, ie the player)lightingan other example post process/replace proxies plugin for lighting, that toggles shadows, lighting config, etc so that things look closer to the original Blender dataphysicsan other example post process/replace proxies plugin for physics, that add Rapier Colliders, Rigidbodies etc . Most of these do not need proxies these days, as the most Rapier components are in the Registry & can be used directly
Feel free to use as you want, rip it appart, use any/all parts that you need !
This tooling and workflow has enabled me to go from a blank Bevy + Blender setup to a working barebones level in very little time (30 minutes or so ?) ! You can then add your own components & systems for your own gameplay very easilly
Information
- the Bevy/ Rust code is here
- the Blender file is here
- I added bevy_editor_pls as a dependency for convenience so you can inspect your level/components
Limitations / issues
- the components have to be defined in
textin Blender, might try using the AppTypeRegistry and some Python code on the Blender side for a nicer UI (although this loses the "fast & easy, no tooling" approach) - the asset management in this example is stripped down for demo purposes, I normally use https://github.com/NiklasEi/bevy_asset_loader to define, organise and preload assets (in a different state that comes before the actual game/level), so you will see some of the changes to the level/scene "flash by"
- Some of
bevy_rapier/physics code / ways to define colliders could perhaps be done better within Blender (currently it also goes via RON)
Future work
- I have a number of other tools/ code helpers that I have not yet included here, because they need cleanup/ might make this example too complex
- gltf spawning tools where you just need to preload gltf files then you can spawn 1...n entities defined in gltf files by name (for example enemies, powerups, etc)
- simplified animation logic: ie instead of having to manually specify the animations you need from a gltf file, it is integrated with the spawning system above, which creates a
Animationscomponent in all entities that have anAnimationPlayerand you can simply query for both to easilly control your animations per entity.
Bonus !!
- for convenience I also added a Blender addon that automatically exports your level/world from Blender to gltf whenever you save your Blend file (actually when you save inside your level/world scene or in the "library" scene, where I personally usually store all collections to instanciate). It is very barebones and messy, but it does a minimal ok job.
Installation:
- in Blender go to edit => preferences => install
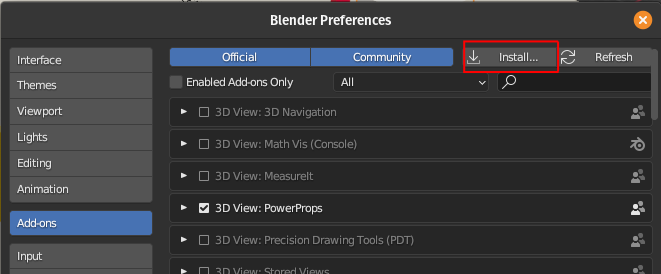
- choose the path where
blender_auto_export/blender_auto_export_gltf.pyis stored

Usage:
- before it can automatically save to gltf, you need to configure it
- go to file => export => gltf auto export
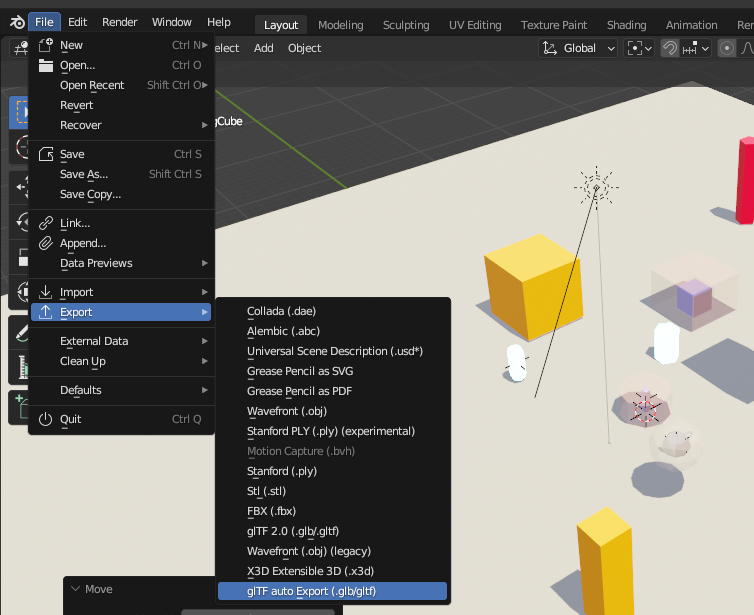
-
set up your parameters: output path, name of your main scene etc
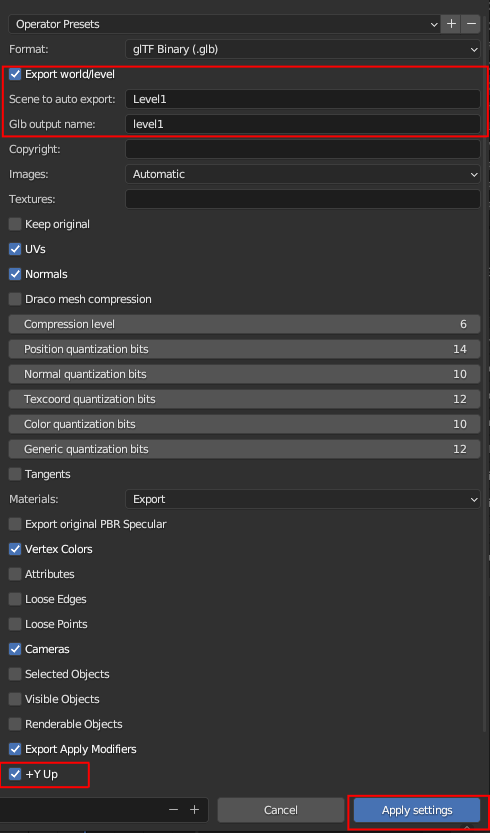
-
click on "apply settings"
-
now next time you save your blend file you will get an automatically exported gltf file
Credits
- somebody I cannot recall helped me originally with the gltf loading tracker in the Bevy Discord, so thanks ! And if it was you, please let me know so I can give credit where credit is due :)
License
This example, all its code, contents & assets is Dual-licensed under either of
- Apache License, Version 2.0, (LICENSE-APACHE or https://www.apache.org/licenses/LICENSE-2.0)
- MIT license (LICENSE-MIT or https://opensource.org/licenses/MIT)