* feat(tools): scene component injection & export - ambient light, shadowmap resolution, bloom intensity, ambient occlusion are now directly settable from scene components that are injected automatically in the scene - relaxed requirements for changes(aka when to export gltf) for main scenes, so that render , background etc changes also trigger a save - added scene components examples - added additional proxies & handling for camera & lights - in relevant cases, made sure that entity specific components are not overridden by scene components - added option to toggle scene level exports of params/ components - ambient colour/ intensity is now also set as background/clear colour - updated docs |
||
|---|---|---|
| .. | ||
| docs | ||
| ui | ||
| __init__.py | ||
| auto_export.py | ||
| config.py | ||
| helpers_collections.py | ||
| helpers_export.py | ||
| helpers_scenes.py | ||
| helpers.py | ||
| internals.py | ||
| materials.py | ||
| preferences.py | ||
| README.md | ||
| scene_components.py | ||
gltf_auto_export
This Blender addon
- automatically exports your level/world from Blender to gltf whenever you save your Blend file.
- in Blueprints mode (highly recommended !) :
- supports automatic exports of used collections as Gltf blueprints
- supports any number of main/level scenes
- Blender scenes where you define your levels, and all collection instances are replaced with "pointers" to other gltf files (all automatic)
- supports any number of library scenes
- Blender scenes where you define the assets that you use in your levels, in the form of collections
- automatic export of changed objects & collections only ! a sort of "incremental export", where only the changed collections (if in use) get exported when you save your blend file
Installation:
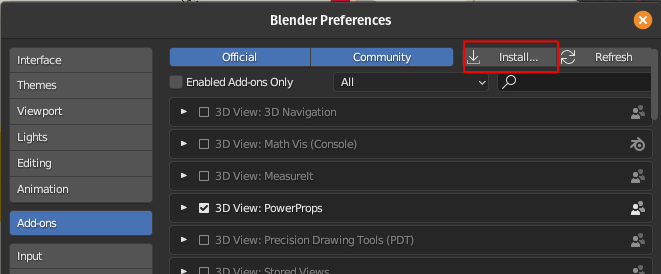
- grab the latest release zip file
- in Blender go to edit => preferences => install
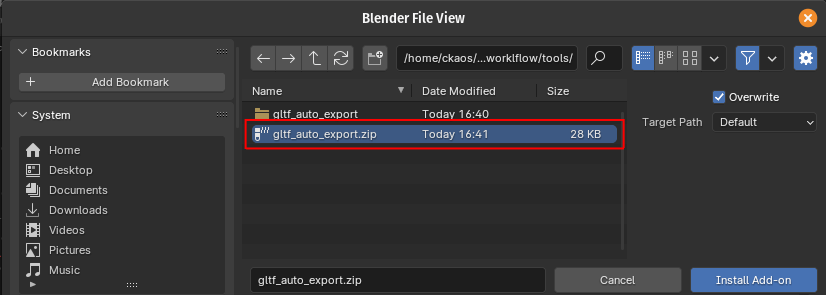
- choose the path where
gltf_auto_export.zipis stored
Usage:
Basics
- before it can automatically save to gltf, you need to configure it
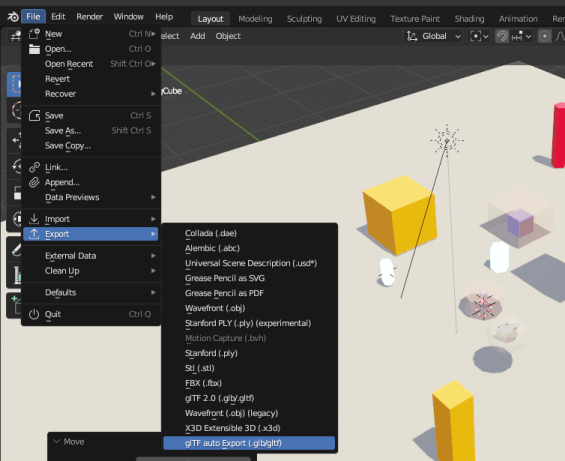
- go to file => export => gltf auto export
-
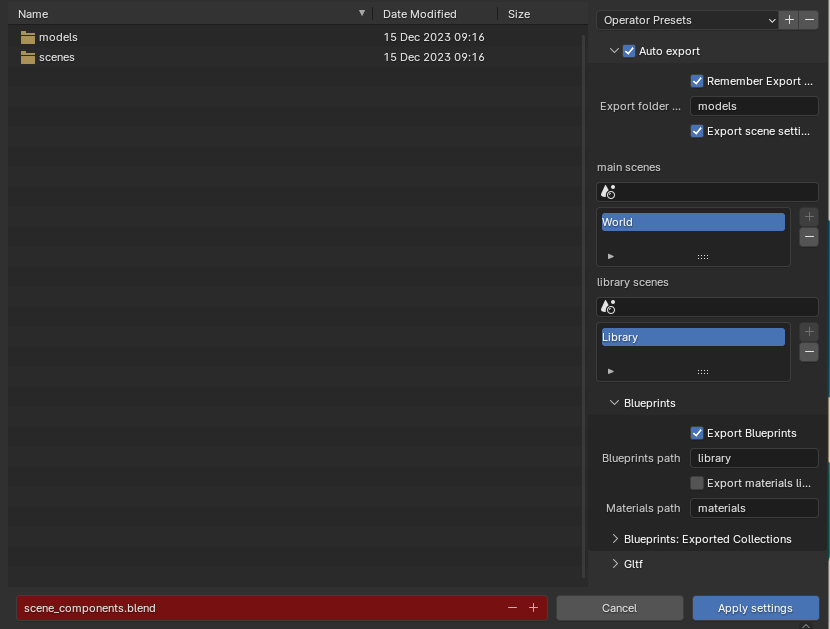
set the autoexport parameters in the auto export panel:
-
export folder: root folder to export models too
-
export scene settings: exports "global"/scene settings like ambient color, bloom, ao, etc
This automatically generates additional components at the scene level
-
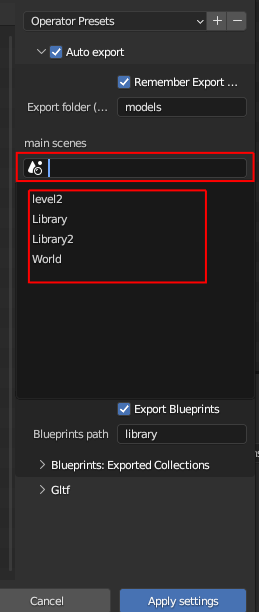
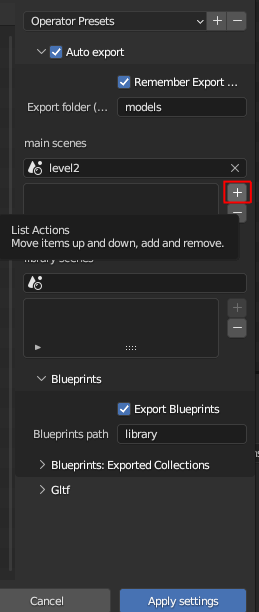
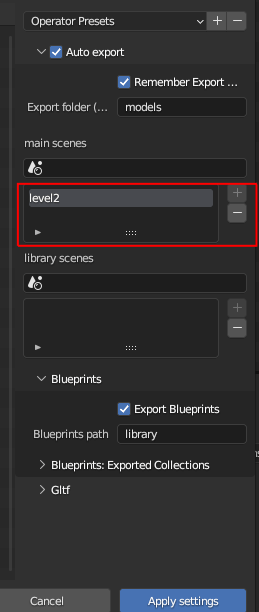
pick your main (level) scenes and library scenes (see the chapter about Blueprints below)
- click in the scene picker & select your scene
- click on the "+" icon
- your scene is added to the list
-
export blueprints: check this if you want to automatically export blueprints (default: True)
-
blueprints path: the path to export blueprints to , relative to the main export folder (default: library)
-
export materials library: check this if you want to automatically export material libraries (default: False) please read the dedicated section below for more information
This only works together with blueprints !
-
materials path: where to export materials to
-
-
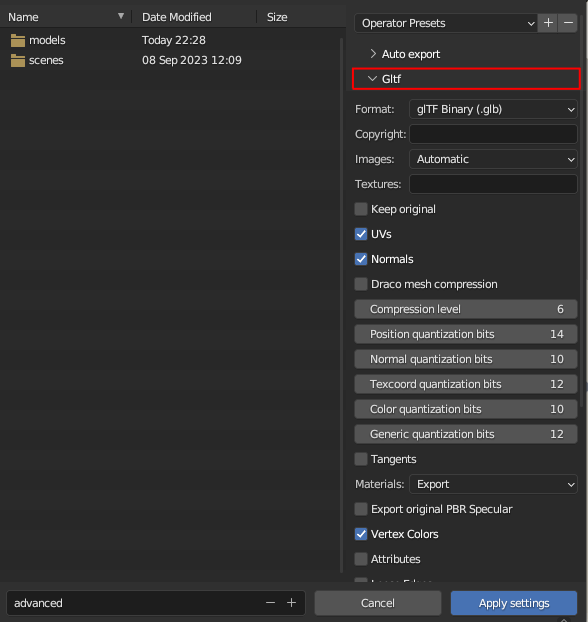
and your standard gltf export parameters in the gltf panel
- click on "apply settings"
- now next time you save your blend file you will get an automatically exported gltf file (or more than one, depending on your settings, see below)
Blueprints
You can enable this option to automatically replace all the collection instances inside your main scene with blueprints
-
whenever you change your main scene (or your library scene , if that option is enabled), all your collection instances
- will be replaced with empties (this will not be visible to you)
- those empties will have additional custom properties / components :
BlueprintName&SpawnHere - your main scene/ level will be exported to a much more trimmed down gltf file (see next point)
- all the original collections (that you used to create the instances) will be exported as seperate gltf files into the "library" folder
-
this means you will have
- one small main gltf file (your level/world)
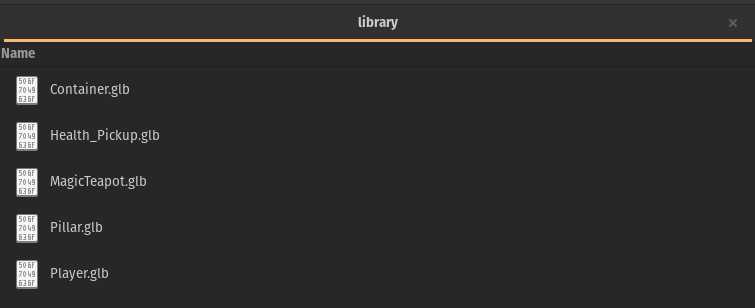
- as many gltf files as you have used collections in the main scene , in the library path you specified : for the included basic example's assets, it looks something like this:
the .blend file that they are generated from can be found here
-
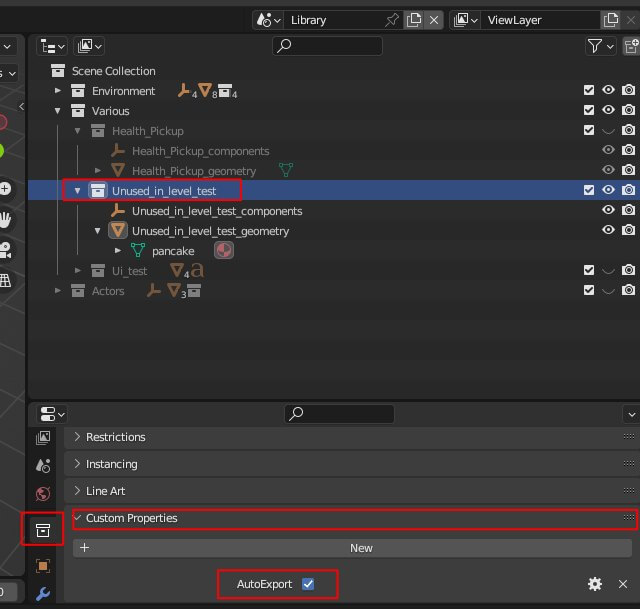
the above only applies to collections that have instances in your main scene! if you want a specific collection in your library to always get exported regardless of its use, you need to add a COLLECTION (boolean) custom property called
AutoExportset to truenot at the object level ! the collection level !
It will get automatically exported like any of the "in-use" collections.
-
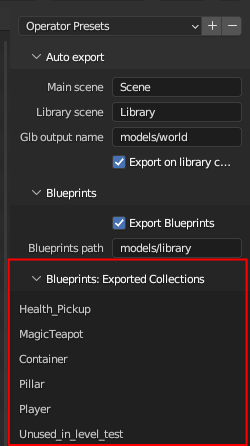
you can also get an overview of all the exported collections in the export menu
Materials
You can enable this option to automatically generate a material library file that combines all the materials in use in your blueprints.
Since each blueprint is normally a completely independant gltf file, without this option, if you have a material with a large texture for example, ALL of your blueprints using that material will embed that large texture, leading to significant bloat & memory use.
- When this option is enabled, you get a single material library per Blender project, and a MaterialInfo component is inserted into each object using a material.
- The correct material will then be inserted on the Bevy side (that loads any number of material libraries that you need) into the correct mesh (see the configuration options in bevy_gltf_blueprints for more information on that)
- Only one material per object is supported at this stage, ie the last material slot's material is the one that is going to be used
TLDR: Use this option to make sure that each blueprint file does not contain a copy of the same materials
Process
This is the internal logic of the export process with blueprints
ie this is an example scene...
and what actually gets exported for the main scene/world/level
all collections instances replaced with empties, and all those collections exported to gltf files as seen above
Development
- since the code has now been split up into multiple modules, to make your life easier, I highly recomend (if you are using vscode like me) to use this excellent extension , works easilly and fast , even for the latest versions of Blender (v4.0 as of this writing)
- this article might also help out (easy enough to get it working on linux too)
License
This tool, all its code, contents & assets is Dual-licensed under either of
- Apache License, Version 2.0, (LICENSE-APACHE or https://www.apache.org/licenses/LICENSE-2.0)
- MIT license (LICENSE-MIT or https://opensource.org/licenses/MIT)

